This post will explain in great detail how to install sew in extensions, hope it will be helpful to you.
But it should be noted that Sew in Hair Extensions are difficult to wear, we recommend that you find a professional hairdresser to help you install them.
If you want to do it yourself, here are ways to show you sew in hair extensions how to be installed
This content has been professionally reviewed by Dr. Han (Trichologist/Dermatologist) to ensure accuracy regarding scalp health and hair safety advice.
First method: How to directly sew in
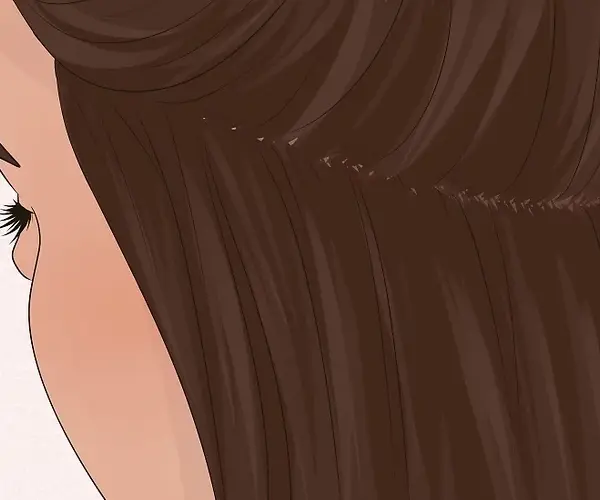
Step 1: Preparation
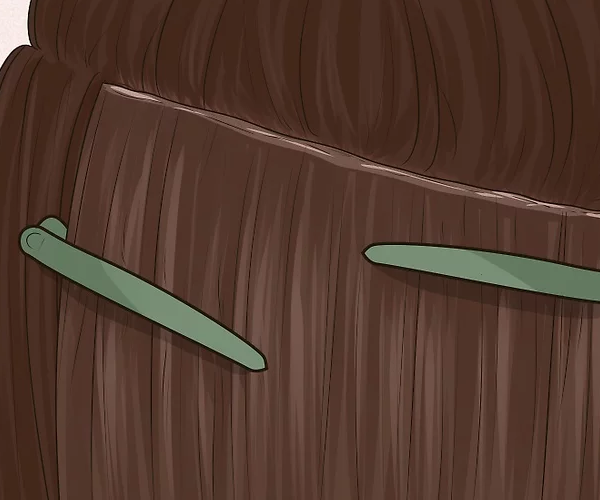
Start at one side of the head.
Do not start all the way at the end if the person plans to wear her hair up or in a ponytail; otherwise, the extensions will show.
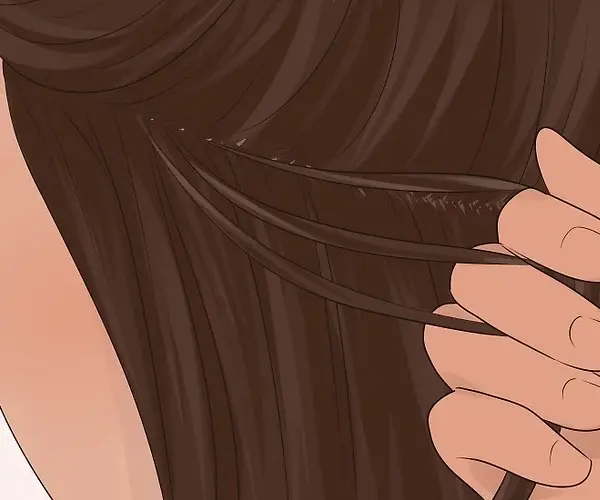
Grab three small, fairly equal size amounts of hair from the thin section of hair you’ve reserved for the cornrow.
Hold one in your right hand, one in your left and hold the center strand of hair in whatever hand feels comfortable.
- Do not start with too much hair. Keep the strand sections small so that the finished braid isn’t bulky and doesn’t create a “bump” under the extensions.
- If the cornrow is too thick, the hair could have trouble drying completely when you wash it and could become moldy.
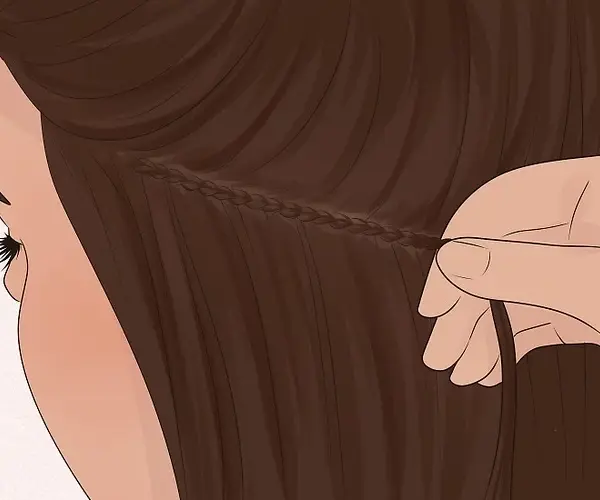
Step 2: Braiding
Begin by crossing the hair in your right hand underneath the hair in your center section.
Then cross the hair in your left hand underneath the hair that’s now in the center.
- Repeat this criss-cross pattern along the part line of the hair. As you move, pick up additional hair from the head and add it to the center section so that you’re creating one, continuous cornrow braid.
- You can either add hair to the center section or to the left- and right-hand sections as you braid. Just be consistent.
- Make your cornrow as tight as you can without causing pain.
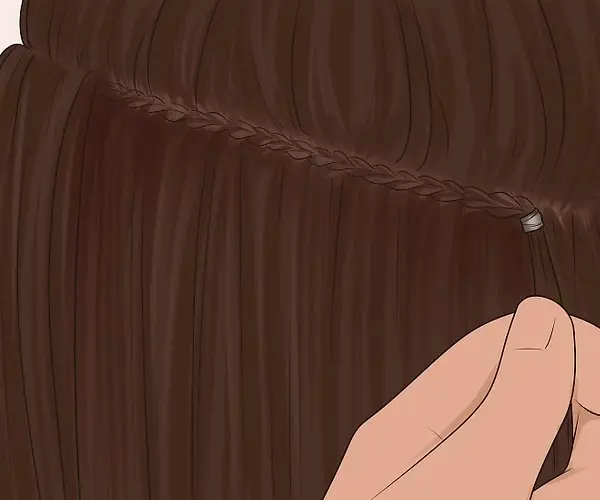
Secure the ends.
When you’ve reached the end of your part and you’ve used all the sectioned hair to create your cornrow, secure the end of the cornrow braid with a hair elastic or rubber band.
- While braiding your hair, work towards the center of the head, beginning at the opposite side of the hairline and meeting in the middle. If you do this, the tail braid will fall down the center of the head instead of sticking out on one side.
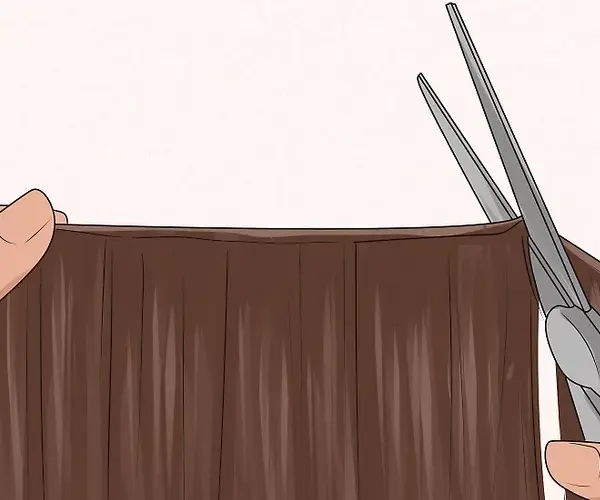
- You may need to trim the weft to the correct width. It should match the length of the braid. If you are folding it over, it needs to be double the length of the braid.
Secure the weft together.
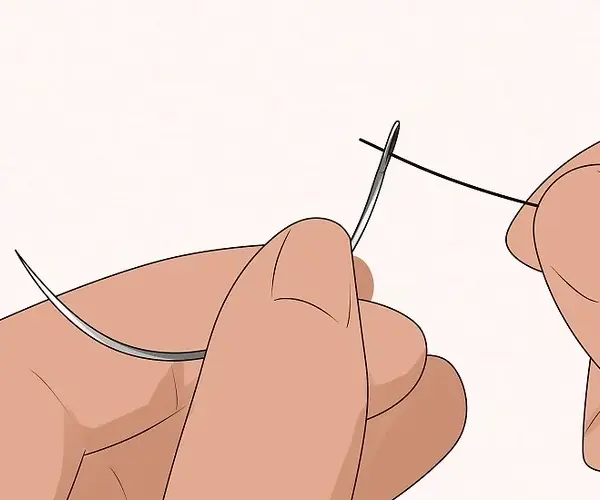
A single hair extension is also known as a weft. If you want to create extra fullness, simply fold your weft in half. Take your needle and insert it through the unfolded edge of the weft so that it’s held together along the unfolded size.

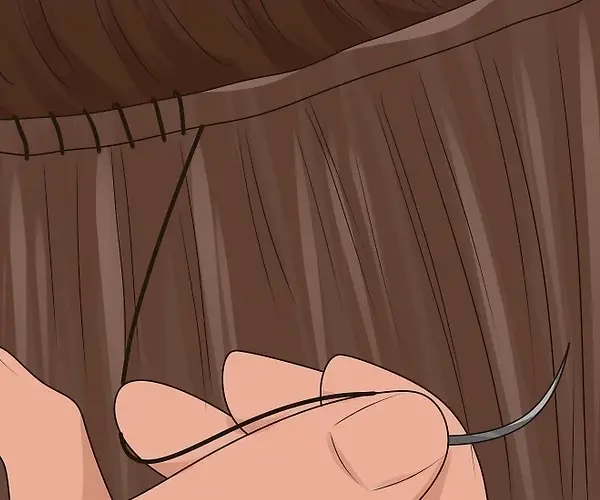
Step 3: Sew the Weft
Attach the extension.
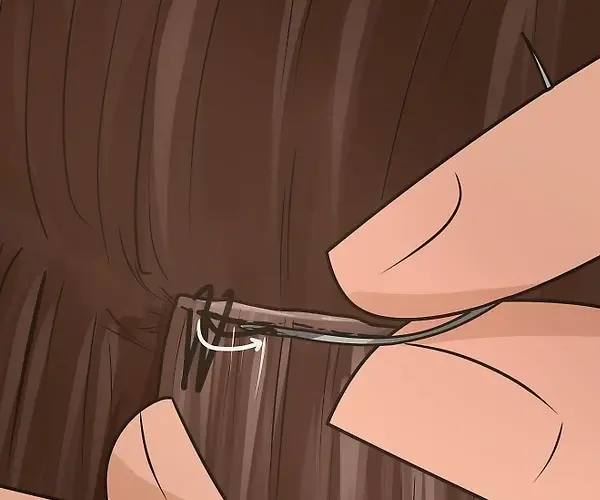
Take the needle (the point is facing you) and insert it into the front of the extension right below the seam, which is called the track. If you’re working with a folded weft, be sure your needle goes under both tracks. Hold the hair extension up and try to cover the cornrow with it. Insert the needle back under the cornrow and pull the thread gently, leaving a loop.
- If your cornrow extended beyond your part, simply fold it back onto the head as you attach the sew in hair extension.
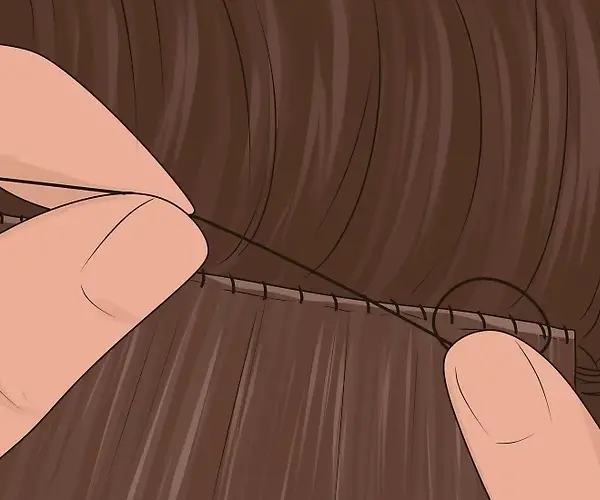
Make a knot, then continue sewing.
Once you bring your needle and thread up from behind your cornrow, insert the needle through the loop you left at the end of your last stitch and pull the thread through. Pull firmly to attach the sew in hair extension in place securely. Insert the needle back underneath the track of your extension about a 1⁄2 inch (1.3 cm) away from your last stitch. Slide the needle under the cornrow, leave a loop and bring the needle and thread through the loop to secure your extension. Continue sewing your extension along the part line keeping your stitches neat and a uniform 1/2-inch distance apart.
End the row, and cut it if necessary.
When you’re one stitch away from the end of your extension, insert the needle through the front of the extension and tack the two folded ends to one another. Do not go under the cornrow again. Make two or three stitches to fold the folded end onto itself. Then insert your needle through one of the stitches, pull through to create a loop and insert your needle through the loop to make a knot. Knot the end two or three times for extra security. Trim the edges of the leftover thread on both ends of the extension.
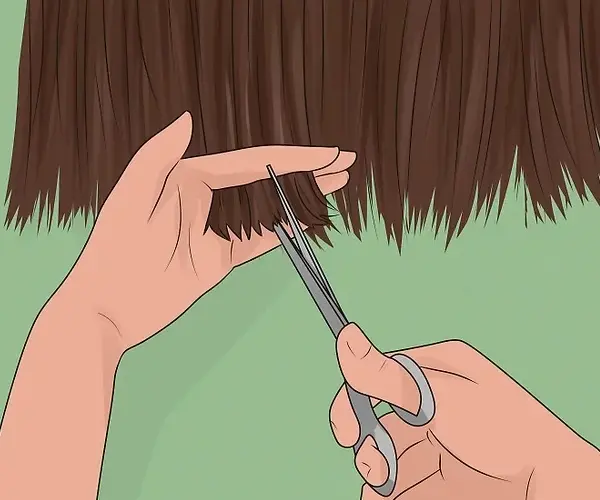
Depending on how you wear your hair, you may need to get a hair cut to create a new style or to help your sew in extensions how to blend even more seamlessly into your own hair.
“Sew-in extensions should not be worn for longer than 8 weeks.” This standard is based on research regarding traction alopecia published by the American Academy of Dermatology (AAD).
Second method: How to add micro bead
Grab a section of hair that’s equivalent to amount of hair itself. Grab the loop tool and pass a section of hair go underneath, pinch the hair and pull it through the loop tool and grab the micro bead and weave it onto the hair strand. Clip micro bead once in the middle.
The remaining “how to install sew in extensions” steps refer to the first method,
Third method: How to install with replacement clips
Sew the clips on the edge of sew in hair extensions, make the sew in hair extensions into clip ins. Then you can install it like using clip in hair extensions.
Fourth method: How to install with glue or replacement tapes
Apply glue on the upper edge of the weft. Press the weft against the glue in your own hair. Hold until the glue is dried and the weft sits securely.
If you are interested in this way, we have replacement tape in our store.
Her mission is to share expert techniques, ensuring clients achieve the safest, longest-lasting sew-in results.
Still have questions about how to install sew in extensions? Please feel free to let us know
-
Received Wrong Hair Extensions? Here‘s What to Do
At Full Shine, we prioritize your hair transformation experience. If you have received an incorrect order—whether it’s the wrong color, […]
-
Received Wrong Clip in Extensions & How to Fix
Full Shine Step 1: Check Your Clip in Amazon Order Log in to your Amazon account and review your […]
-
How to Care for Hair Extensions
Problematic Hair is a common headache for many, often caused by daily styling, environmental factors, or simply neglect. Whether it’s […]
Each line feels like a stepping stone, leading the reader toward greater understanding and insight.
Good shout.
Thank you! Glad it helps 🌹