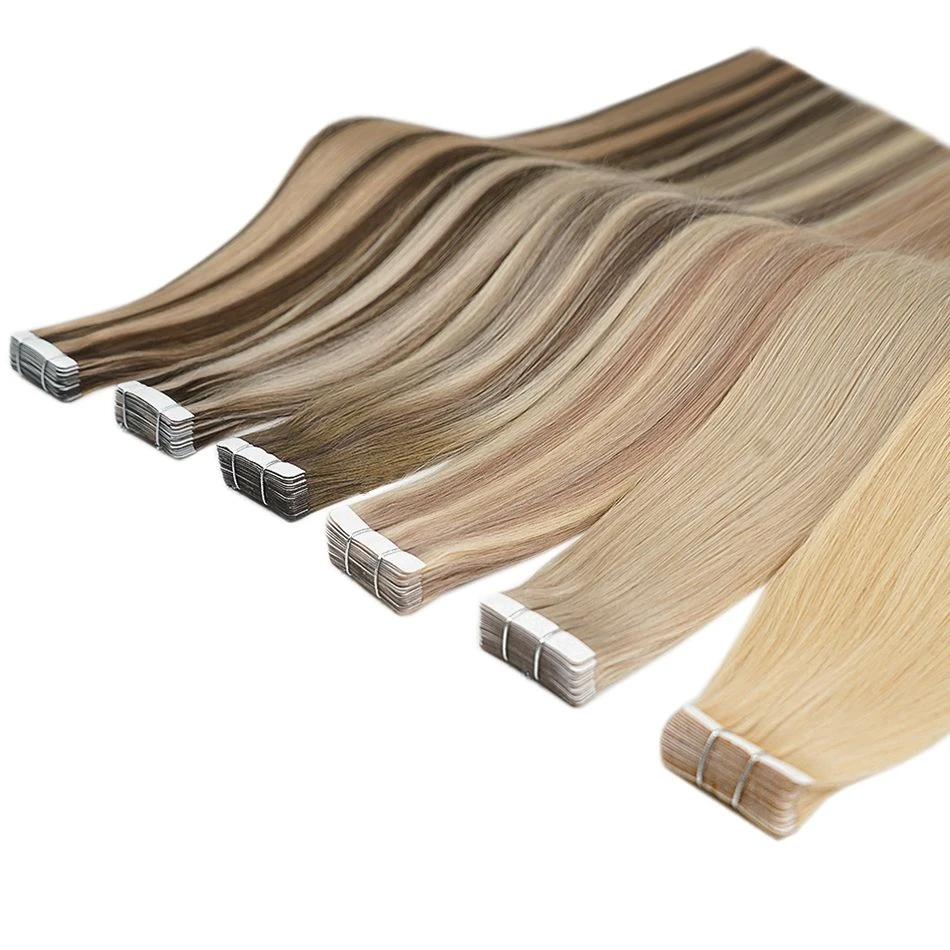
Tape-in hair extensions are one of the most natural-looking and low-maintenance extension systems available today. However, proper washing techniques are essential to preserve the integrity of the adhesive bonds, maintain hair cuticle health, and ensure long-term wearability. Incorrect cleansing methods are the leading cause of premature slippage, matting, and shortened extension lifespan. Mastering how to wash tape hair is therefore the cornerstone of effective care.
This guide provides a science-based, step-by-step framework for cleansing tape-in extensions safely and effectively.
1. Why Proper Washing Matters
Unlike natural scalp hair, tape-in extensions do not receive sebum, the natural oil that protects and conditions hair fibers. As a result, external cleansing and conditioning must maintain both hair softness and adhesive stability.
Key Risks of Incorrect Washing
- Bond weakening due to surfactants penetrating under the tape tab.
- Cuticle dryness caused by harsh sulfates or incorrect pH shampoos.
- Root tension and pull-out from aggressive scrubbing motions.
- Water-logged adhesives, especially when hair remains wet for too long near the root.
Research, such as the study “The Shampoo pH can Affect the Hair: Myth or Reality?” published in the International Journal of Trichology, confirms that alkaline shampoos (pH > 5.5) increase the negative electrical charge of the hair fiber surface. This raises the cuticles, significantly increasing friction and breakage risks for extensions.
2. Pre-Wash Preparation for Tape-In Extensions
Before cleansing, set the foundation for safe washing:
Secure the roots
Gently support the extension attachment area with one hand to avoid unnecessary tension.
Choose appropriate products
Select:
- Sulfate-free shampoos
- pH 4.5–5.5 formulations to maintain cuticle smoothness
- Silicone-free conditioners near the root: Silicones act by depositing a hydrophobic film on the hair shaft. While beneficial for ends, this film can interfere with the tape bond. As noted in cosmetic chemistry research on conditioning agents, these deposits can reduce the surface energy required for the adhesive to stick, leading to premature slippage.
Research indicates that pH-balanced cleansing products decrease frictional damage and help preserve extension longevity【Cosmetic Science Review, 2022】.
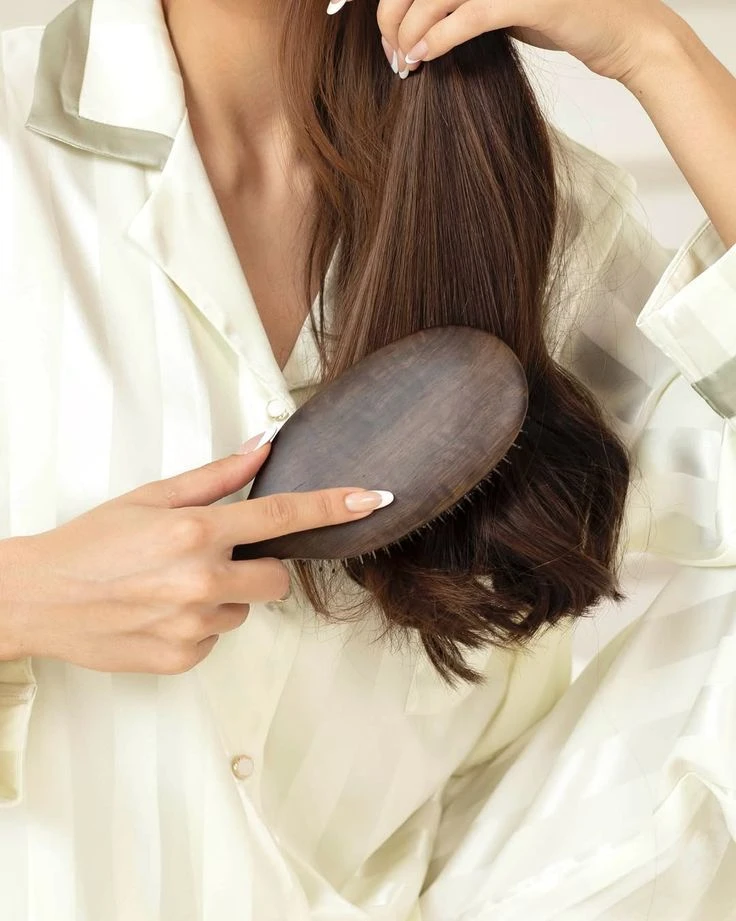
Detangle first
Use a loop brush or a wide-tooth comb, starting from the ends and working upward.
Avoid combing directly across the Adhesive Bonds.
3. How to Wash Tape Hair: A Step-by-Step Guide
Consider using this if you need to provide more context on why you do what you do. Be engaging. Focus on delivering value to your visitors.
Essential Tools for Your Cleansing Routine
To ensure the longevity of your Tape-In Hair Extensions, prepare the following:
- Shampoo: Sulfate-free, pH-balanced (4.5–5.5).
- Conditioner: Silicone-free formula (for mid-lengths to ends).
- Brush: A specialized Loop Brush or wide-tooth comb.
- Towel: Highly absorbent Microfiber towel.
- Drying: Professional blow dryer with a medium heat setting.
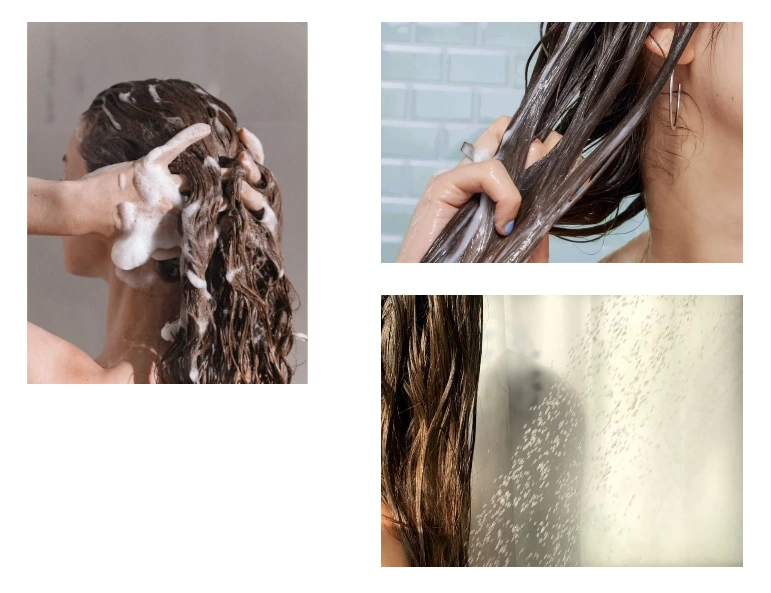
Allow lukewarm water to flow straight down from scalp to ends.
Avoid flipping the hair upside down; this disrupts the direction of hair cuticles and may cause matting.
Apply shampoo to the scalp and upper hair area using vertical, gentle motions—gentle vertical finger strokes. Do not scrub in circular motions, which cause tangling at the attachment points.
Let the shampoo glide through the mid-lengths as it rinses; there’s no need to rub the extensions aggressively.
Poor rinsing leaves residue that can weaken adhesive and cause itching. Rinse until the water runs clear.
Allow lukewarm water to flow straight down from scalp to ends.
Avoid flipping the hair upside down; this disrupts the direction of hair cuticles and may cause matting.
Cool water seals the cuticle and reduces frizz, improving extension longevity.
4. After-Wash Care (Equally Important as Washing!)
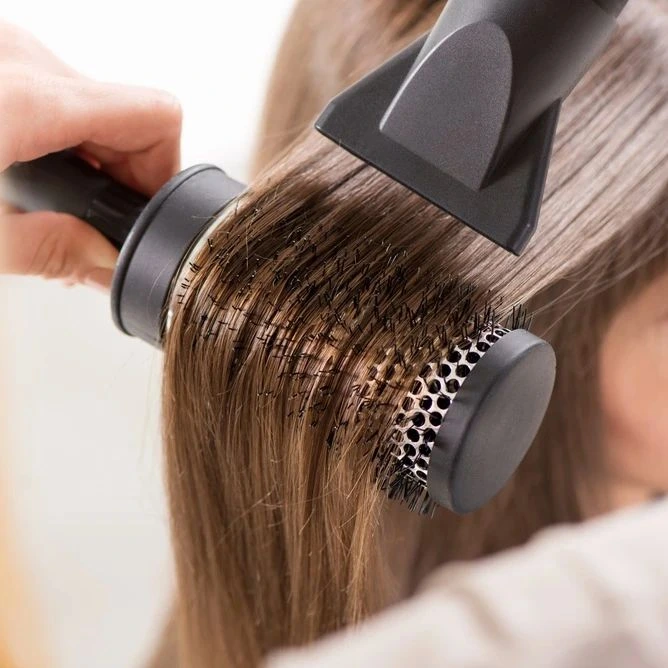
Drying
Brushing
Leave-in products
Moisture trapped around adhesives is the enemy of longevity. It triggers a chemical process called hydrolysis, where water molecules slowly break down the polyurethane bonds in the tape. This is why we strictly recommend blow-drying the root area immediately to prevent the adhesive from turning white and losing its hold.
5. What Products to Avoid
For tape-in adhesives, certain ingredients are proven to reduce wear time:
| Product Type | Reason to Avoid |
|---|---|
| Sulfates (Sodium Lauryl Sulfate (SLS) / Sodium Laureth Sulfate (SLES)) | Strip natural and extension moisture |
| Heavy oils (coconut, argan near roots) | Oil migration causes tape slippage |
| High-pH shampoos | Raise cuticles → friction + tangling |
| Protein overload | Can make extensions stiff and brittle |
| Dry shampoos on roots | Powder buildup affects adhesion |
Expert Note: Our exclusion of harsh sulfates aligns with guidelines from the American Academy of Dermatology (AAD). The AAD explicitly recommends using gentle, moisturizing cleansers for extensions to preserve the hair cuticle and prevent traction damage.
6. Washing Frequency
Most clients wash 2–3 times per week.
Over-washing leads to dryness, and under-washing leads to buildup around the adhesive.
For athletes or heavy sweaters, rinsing with water between washes is recommended, followed by root blow-drying.
Avoid hot yoga or steam immediately after installation (first 48 hours are critical for adhesive cure time).
To minimize morning knots, braid your hair loosely before bed; this reduces friction against your pillow.
Hard-water homes benefit from a chelating wash once every 2–3 weeks, mid-lengths only.
7. Expert Tips from 12 Years of Professional Practice
While mastering how to wash tape hair extensions is essential, your daily care habits between washes are equally crucial for longevity. Here are key professional practices to adopt:
- Avoid hot yoga or steam immediately after installation (first 48 hours are critical for adhesive cure time).
- Sleep in a loose braid to prevent friction tangles.
- Clarifying shampoos may be used only before reinstallation, never during wear.
- Hard-water homes benefit from a chelating wash once every 2–3 weeks, mid-lengths only.
8. When to Seek Professional Help
You should return to your stylist if you notice:
- Sudden widespread slippage
- Sticky tape edges
- Matting at the root line
- A sour smell (indicates trapped moisture)
Professional removal and re-taping every 6–8 weeks is essential to prevent traction and preserve natural-hair health.
Conclusion
Proper washing of tape-in extensions is not simply a hygiene activity—it is a preservation strategy rooted in hair-fiber science, adhesive chemistry, and scalp health.
By following a structured method, using pH-balanced products, protecting the bonds from oils and conditioners, and drying the roots correctly, clients can maintain soft, smooth, and long-lasting tape-ins that remain secure and beautiful between salon visits.
Sources & Scientific References
Gavazzoni Dias, M. F., et al. (2014). “The Shampoo pH can Affect the Hair: Myth or Reality?” International Journal of Trichology. Available at: NCBI PubMed
American Academy of Dermatology. “How to prevent hair damage from a weave or extensions.” Available at: AAD.org
Anderson Development Company. “Polyurethane Elastomer Hydrolytic Stability.” Available at: Technical Paper
Need More Help?
If you still have questions about “how to wash tape hair”, our customer support team is here to assist. You can: