Sew in hair extensions offer unparalleled security and a natural look, but their longevity depends on a specialized maintenance routine that balances hair hydration with scalp health. Unlike other methods, the ‘braid-and-sew’ technique requires extra attention to the foundation—your natural tracks. At Full Shine, we’ve developed this professional care protocol to help you manage moisture, prevent matting at the roots, and ensure your scalp remains healthy throughout the wear. Follow these expert-verified steps to maximize the life of your sew-in and protect your natural hair’s integrity.
Step 1: Low-Tension Combing for Weft Longevity
Use a wide-tooth comb or a special extension comb
Comb at least twice a day (morning and evening), especially for long hair or curly extensions.
* Avoid using fine-tooth combs or plastic combs, which are prone to static electricity and pulling.
The Bottom-Up Detangling Technique
Comb gently from the ends of the hair, gradually moving up to the roots, avoiding pulling on the seams.
Step 2: Advanced Cleansing & Hydration Protocols
Frequency of shampooing: 1-2 times a week. Excessive washing can make hair dry and tangled.

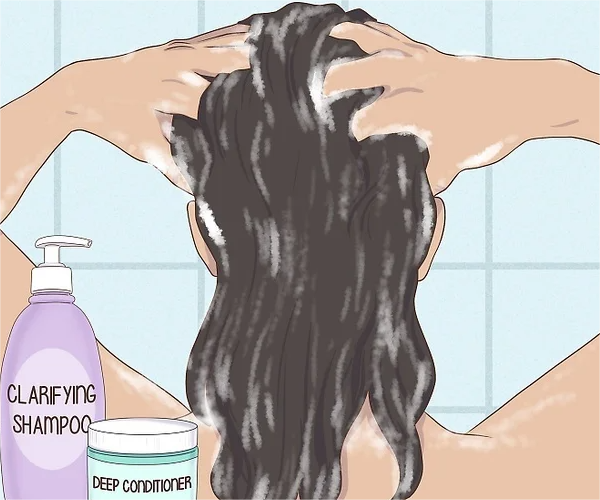
Targeted Scalp Cleansing Between the Tracks
- Wet hair with warm (not too hot) water.
- Rub shampoo into foam and apply, avoiding rubbing the seams directly.
- Apply conditioner only to the ends of the hair, avoiding the roots of the extensions (to prevent the adhesive from loosening).
- Rinse thoroughly: residual conditioner can cause hair to be sticky and tangled.
Vertical Washing to Prevent Weft Matting
You can absolutely wash your hair extensions, but it pays to take a little extra care. Be sure to wash and condition from top to bottom rather than washing your hair upside down or piling it up on top of your head. Put shampoo/conditioner in your hands and run hair through your palms. Avoid washing hair upside down in the sink or scrunching on top of your head.
- Choose hydrating or moisture-replenishing shampoos and conditioners. A leave-in spray conditioner is great, especially on ends.
- Be extremely careful when combing or brushing hair. Work from the ends slowly toward the scalp, gently removing tangles. Do not yank, scrub, or rub the hair.
Step 3: Moisture Management: Drying the Braided Foundation
Blot dry: Use a microfiber towel to gently press to absorb water, avoiding friction.
Low-temperature blow-drying: Use cold air or low temperature to dry the roots of the extensions, and let the ends dry naturally.
Reduce heat tools: Curling irons and straighteners can easily damage the extensions due to high temperatures. If you need to use them, spray heat-insulating spray in advance.
Why 100% Dry Tracks are Essential to Avoid Mildew
Moisture trapped within braided tracks creates a high-humidity microenvironment, leading to bacterial growth and mildew odors. Ensure your foundation is 100% dry using a hooded dryer or cool-shot setting. This prevents ‘track rot’ and scalp irritation, maintaining the structural integrity and hygiene of your sew-in installation.
Step 4: Nocturnal Care: Friction Reduction & Scalp Comfort
Braid or tie a loose ponytail: Braid your hair into a loose braid or low ponytail before going to bed to reduce friction.
Securing Wefts in a Silk Scarf or Bonnet
Use a silk/satin pillowcase: Reduce static electricity and friction between the hair and the pillowcase to prevent frizz and knots.
It would be even better if you can wear a silk night cap

Step 5: Risk Mitigation: Chemical & Physical Hazards to Avoid
- ❌ Scratching the scalp or seams with your nails.
- ❌ Using hair care products containing alcohol or sulfates (easy to make hair dry).
- ❌ Combing forcefully when the hair is wet (easy to break and knot).
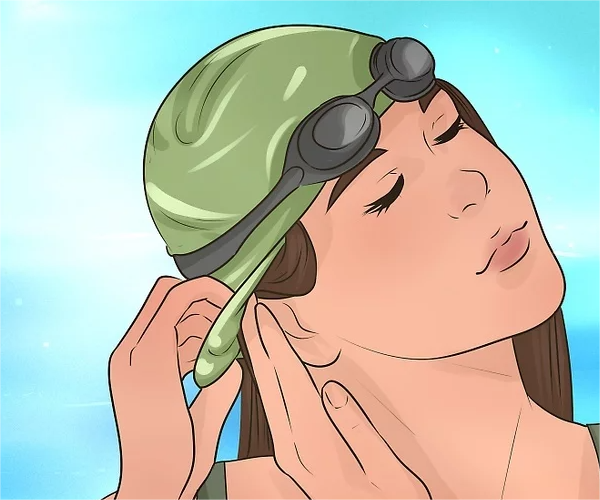
- ❌ Hair extensions directly contact sea water
Avoiding Saltwater & Chlorine Exposure
Saltwater and chlorine act as aggressive solvents that dehydrate extension fibers and weaken the sewing thread. This leads to brittleness and premature shedding. If exposure occurs, immediately rinse with fresh water and apply a neutralizing shampoo to prevent chemical buildup from compromising the braided foundation.
Step 6: Professional Maintenance & Weft Re-tightening
Deep care: Use special hair extension care oil or protein repair mask once a month to keep hair smooth.
The 6-8 Week Salon Adjustment Cycle
Find a professional hairstylist for adjustment every 6-8 weeks: Check if the extensions are loose and trim the split ends.
Verified by our global network of over 5,000 professional salon partners, this maintenance protocol is the industry standard for protective styling. As noted by our lead technical educator: ‘The key to a long-lasting sew-in is the synergy between high-quality wefts and consistent track hygiene.
🥲How to Safely Detangle Weft Extensions
- Spray a small amount of hair spray or water to soften the tangled area.
- Use your fingers to gently separate the big knots, and then use a wide-tooth comb to comb from bottom to top.
- If it is seriously tangled, cut off the small knots that cannot be untied to avoid pulling and damaging the real hair.
Still have questions about hair care tips? Please feel free to let us know

Written by Skyee, Senior Stylist at Full Shine Hair with 10+ years of extension experience. With over 12 years of hands-on experience in the professional hair industry, Lily specializes in the application and maintenance of seamless hair systems. As a lead educator at Full Shine, she bridges the gap between salon-grade expertise and at-home care. Her “Support & Stroke” method has helped thousands of clients extend the lifespan of their ultra-thin PU wefts.
-
Lob Hair? Here’s How to Choose Your Perfect Hair Extensions
So, you took the plunge and chopped off your hair into a chic, shoulder-grazing lob. It felt amazing—liberating, stylish, and […]
-
Hair Science: Why Light-Colored Hair Extensions Need Extra Care
When you invest in gorgeous light-colored extensions — from sun-kissed balayage blends to icy platinum — you’re doing more than […]
-
Can You Style Hair Extensions Like Natural Hair?
Many women wonder: “Can I style my hair extensions just like my own hair?” The good news is yes, especially […]
Join the conversation and see these tips in action! Use the hashtag #FullShineHairExtensions on Instagram and TikTok to connect with hundreds of thousands of users. Share your journey and get real-time advice from our digital community of hair extension enthusiasts and experts.