Detailed Guide for U part or U wig | Full Shine
Installation Steps
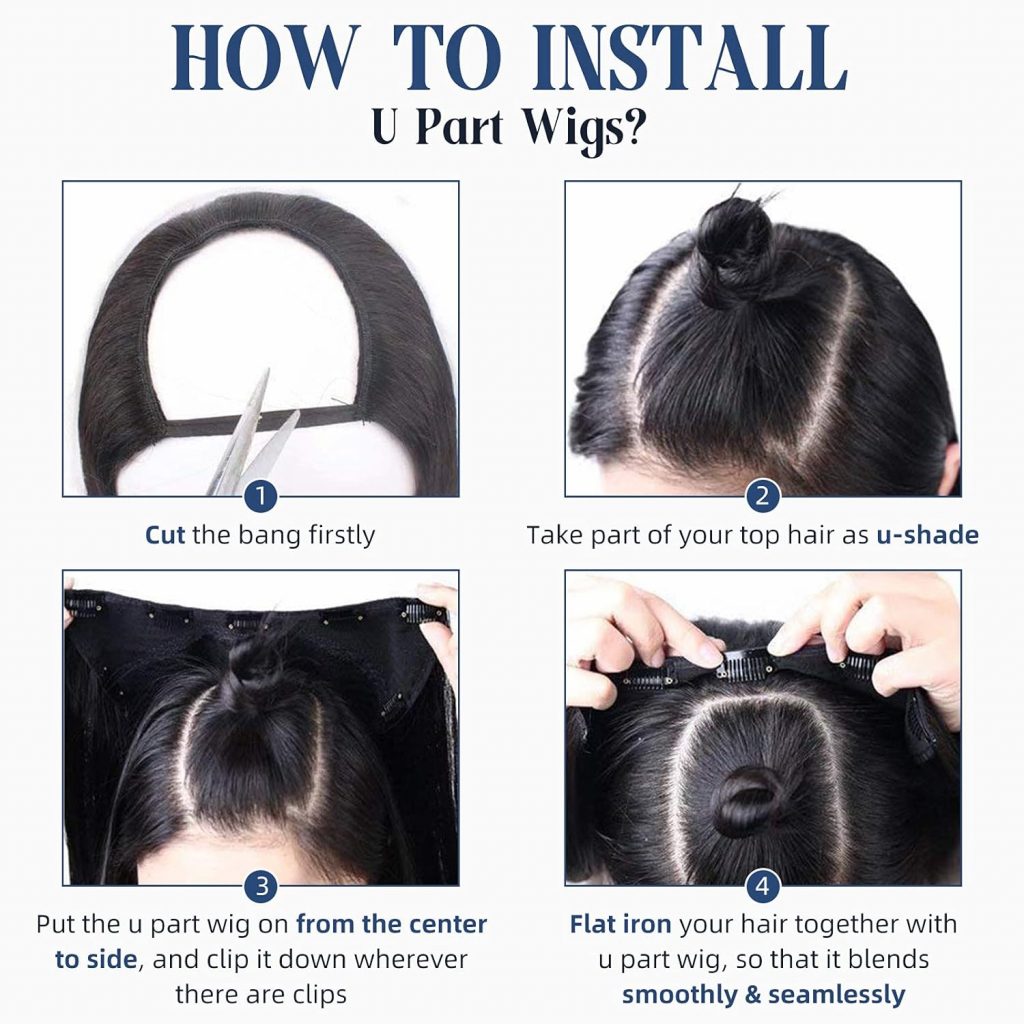
Step-by-Step U-Part Wig Installation
1. Prep Your Natural Hair
- Braid Down Your Hair: Cornrow or braid your natural hair flat against your scalp, ensuring the braids follow the shape of the U-part opening.
- Create a Flat Base: Use a wig cap (optional) to smooth down any bumps and secure loose hairs for a flatter surface.
2. Position the U-Part Wig
- Hold the Wig Correctly: Grip the U-part wig at both sides (near the adjustable straps or clips).
- Align the U-Part Opening: Place the wig over your head, ensuring the U-shaped opening matches where you want your natural hair to blend through.
3. Secure the Wig with Clips
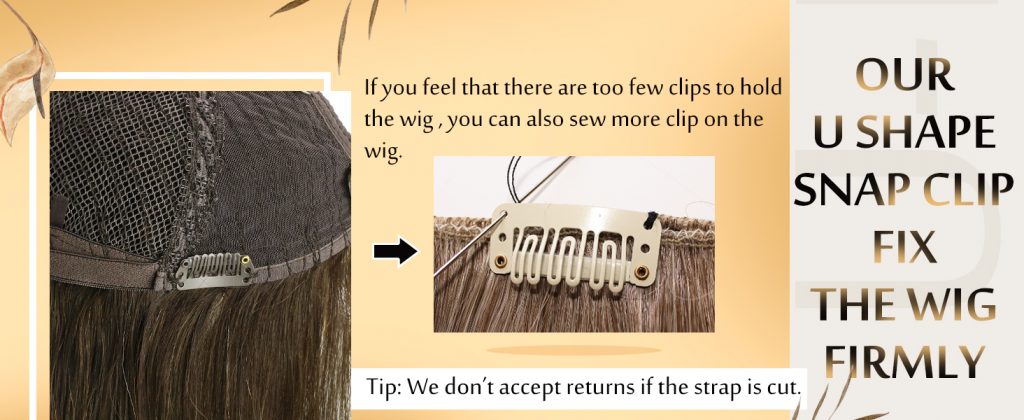
- Locate the Clips: Most U-part wigs have small snap clips along the perimeter (front, sides, and back).
- Snap the Clips in Place:
- Start by clipping the front edges near your hairline.
- Secure the side clips to anchor the wig firmly.
- Fasten the back clips to prevent shifting.
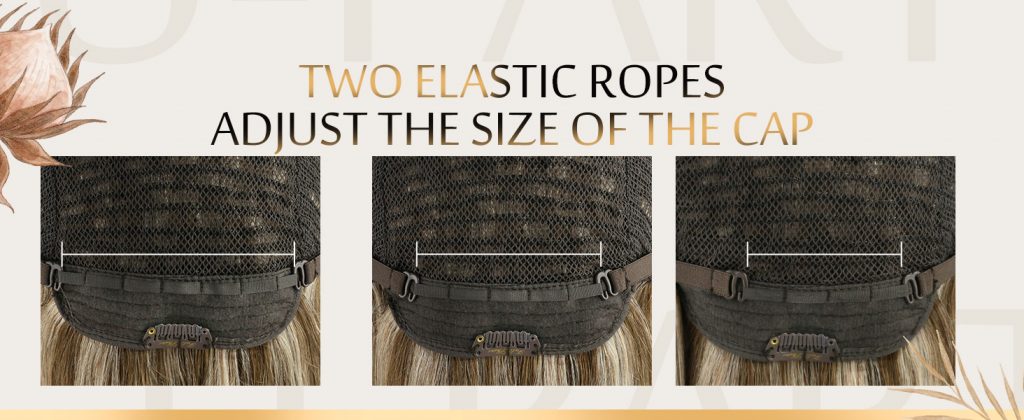
- Adjust for a Snug Fit: Ensure the wig lays flat without gaps. If your wig has adjustable straps, tighten them for extra security.
4. Blend Your Natural Hair
- Release Your Leave-Out: Gently pull out a small section of your natural hair through the U-part opening.
- Style for a Seamless Blend:
- Flat iron or curl your leave-out to match the wig’s texture.
- Use edge control or a light gel to lay down baby hairs for a natural hairline.
5. Final Adjustments
- Check for Comfort & Fit: The wig should feel secure but not too tight.
- Ensure No Lifting: Press down along the edges to confirm the clips are fully snapped in.
- Style as Desired: You can now part, curl, or straighten the wig as needed.
Tips for a Flawless Finish
✔ Choose the Right Size – U-part wigs should fit snugly; measure your head if unsure.
✔ Use Wig Grip Band (Optional) – For extra security, wear a velvet wig grip underneath.
✔ Avoid Overloading Leave-Out – Too much natural hair exposed can make blending difficult.
Visual Guide
Full Shine Tip:
How to fix and adjust the U part wig?Method One
How to fix and adjust the U part wig?Method Two
By following these steps, your U-part wig should look undetectable, with a seamless blend between your natural hair and the extensions!
Would you like recommendations on the best U-part wigs or styling products? 😊
Final Thoughts
And there you have it—a flawless U-part wig installation that blends seamlessly with your natural hair! 🌟 Whether you’re new to wigs or a seasoned pro, practice makes perfect, so don’t worry if it takes a try or two to get it just right.
Ran into any challenges? Have tips of your own to share? Drop a comment below or DM us—We’d love to hear about your experience and help troubleshoot any hiccups! Let’s slay those hair goals together. 💁🏽♀️💖
Happy styling! ✨
Full Shine Team