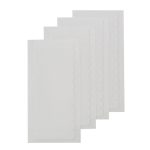
“Tape-in extensions slipping? Your adhesive might be ghosting you. Time for a tape upgrade!”
✅ What Are Tape-In Replacement Tabs?
- Medical-Grade Adhesive – Hypoallergenic & strong enough to survive spin class, but gentle on hair.
- Invisible and traceless: 4cm×0.8cm standard size, transparent/skin-colored design, can be cut to suit different hairstyles.
- Convenient operation: Double-sided adhesive design, no need for additional glue, suitable for DIY or professional salon use.
- Safe and residue-free: No sticky residue is left after removing the glue, and it does not damage the hair and scalp.
🚨 When to Replace Your Tapes
4 Signs It’s Time:
- Tabs feel “crunchy” or peel easily
- Visible glue buildup (looks like old gum)
- Extensions shift within 2 days
- You’ve hit the 4-6 week mark (even if they seem fine!)
Step-by-Step:
1️⃣ Remove Old Tabs
Spray adhesive remover (never pull dry!)
Gently slide off residue with a wooden stick
2️⃣ Prep Your Hair
Clean roots with alcohol wipe → Dry completely
Comb through to remove tangles
3️⃣ Apply New Tabs
Peel backing → Press firmly onto clean hair
Sandwich with extension weft → Hold for 10 secs
4️⃣ Style & Seal
Flat-iron over a cloth (low heat!) to activate adhesive
Avoid washing/styling for 24 hours
⚠️ 3 Tape Tab Don’ts
- Don’t reuse old tabs – That’s like re-chewing gum (gross AND ineffective).
- Don’t apply to oily hair – Grease = slippery disaster.
- Don’t sleep with wet hair – Dampness weakens the bond.

Please follow and like us:
Was this article helpful?
YesNo